EmerSSL Guide
What’s the point?
Password-only logon has long been recognized as outdated and insecure. The very method has fundamental drawbacks: Passwords are vulnerable to sniffing, keylogging, video surveillance, phishing, social engineering, and public access point hijacking. It gets even worse because most users tend to use the same password on many websites.
All in all, there is no peace of mind for password users.
An EmerSSL blockchain certificate, which you only need to install once, solves the above problems. It establishes a direct secure connection to the exchange, making man-in-the-middle attacks and phishing futile. At the same time, you can still log on to the exchange with your password as a backup method.
How it works
Before creating an EmerSSL certificate, you will need:
- A synchronized Emercoin wallet — it will take 1–1.5 hours to install it for the first time.
- A few EMC coins — you can buy them.
- For Windows users, OpenSSL.exe to generate certificates (here or here).
- An existing Livecoin account.
Video instruction: How to install the EmerSSL certificate (The example shows the now defunct Livcoin exchange, but the procedure for creating a certificate is not affected.) You can check the functionality of the certificate, for example, on FoundICO (Menu "Login")
Outdated, manual version:
This article will guide you through step by step instructions for using EmerSSL to create a new certificate and use it to log in without a password to a website that supports it. The guide assumes you are running the Emercoin GUI wallet and have some EMC in your wallet balance.
Follow these steps:
-
First, download the EmerSSL bundle (or get the latest from GitHub).
-
Next, create an Emercoin InfoCard on the Emercoin blockchain. Creating an InfoCard is optional, but can be useful if you would like to auto-fill some default info about yourself with each website you create a login for.
-
Template Generation: To generate a template in Linux, the script gen_tpl.sh is used, which is in the same bundle as the InfoCard. Unpack the archive with the script, open a terminal and go to the folder X509, and run gen_tpl.sh.
$ cd downloads/X509
$ ./gen_tpl.sh
If in Windows, run gen_tpl.bat.
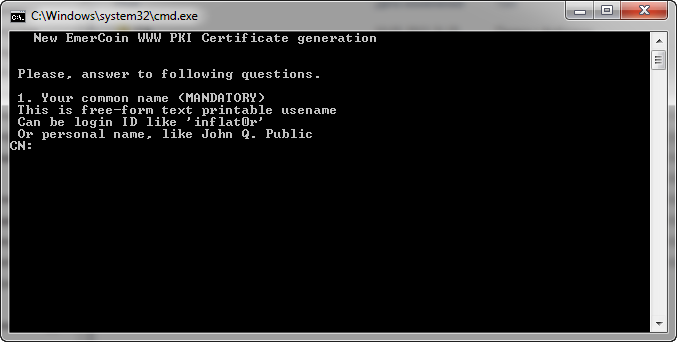
The program prompts you to enter the data to be used for the certificate:
- CommonName - login (username). The only required parameter.
- Email - your mail, leave this empty.
- UID - a reference to additional information about the owner of the certificate, such as InfoCard. If you created InfoCard, enter the UID data (obtained when generating the *.ze file):
- info: e120319a479f4ac4: ac7c3821f171b6a8bd8cd33d829f5b
If all goes well, you will see the following entry:
Created EmerSSL Certificate template: ceabec4544e2ab86.tpl -
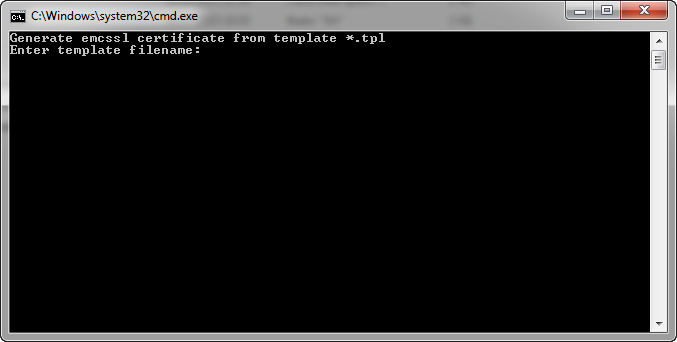
Certificate generation: Now we need to run the script gen_crt.sh with the obtained parameter:
./gen_crt.sh ceabec4544e2ab86.tplIn Windows, run gen_crt.bat
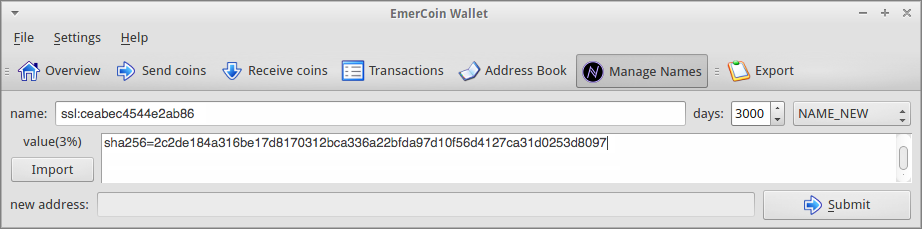
The script asks you to enter a password to import the certificate into the browser. You must enter a password and confirm it. Then you will see the message:
Please, deposit into Emercoin NVS pair:
Key: ssl:ceabec4544e2ab86
Value: sha256=2c2de184a316be17d8170312bca336a22bfda97d10f56d4127ca31d0253d8097
Open the wallet tab Manage Names and copy Key into the Name field and Value in the Value field, and click Submit. The New address field should be left blank.
-
Import the certificate into the browser: Now the certificate obtained in the previous section (and which should appear in the folder with the script) is to be imported into the browser. The certificate has the extension *.p12. OSX users should just double click on the file. This opens Keychain Access and asks you to enter the password you gave when generating the certificate. For other operating systems, everything happens similarly. Importing a certificate doesn't differ from normal client SSL-certificates, and is done through the appropriate setup menu of the browser. Here are guidelines for some common browsers:
-
Verifying the certificate: You can check the operation of the certificate in the Emercoin pool. To get started, click here. If you see something like this, it means everything is in order:
pid=30275
main: SSL-certificate presented

SerialNo: FD493EAEEA64B563
Currency: EMC
CommName: kamillo
e-Mail : [email protected]
InfoCard:

EmerSSL_validate() RETURNED: $EX4WHi2ABUkinKX6jACUxanhMqDYbbcyEj
Now go to the registration page of the pool and click Register with EmerSSL. The system should tell us that the registration was successful. Then click Login with EmerSSL to authorize yourself on the site.
Congratulations on using EmerSSL to log in to a website without entering a password!
If you have questions, feel free to ask.